|
|
|
 |
Landscape Drip Irrigations
Drip Irrigation Parts and Instructions for all of Your Needs |
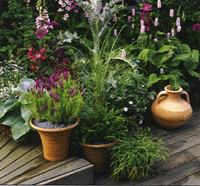
POTS / BASKETS / MISC.
Patio Pots On a Separate Zone
(Page 2 of 2)
|
| |
SOLUTION |
|
Multi-Outlet Manifold on a Poly Lateral
Advantage:
- Up to 60% water savings
- Poly tubing flexible for odd shaped areas
- XB-05-6 ensures even watering to multiple ports
|
|
|
INSTALLATION & MATERIALS LIST |
Click-n-Buy - Click on Part Number to Add Items to Your Cart |
To-Do List
Description |
Time (Approx.) |
| Trench (as needed), cut, and glue PVC laterals. |
Varies by application |
| Connect lines to water source. |
1 hr |
| Thread XBD-80 manifold onto PRS-050 then connect to PVC tee. |
5 min / Assembly |
| Attach 1/4" distribution tubing to outlest on XBD-80 manifold. |
3 min / XBD-80 |
| Run 1/4" lines to sparse plantings, stake in place with a bug cap on end. |
8 min / Pot |
| Install the desired Drip Emitter inside XBD-80 manifold. |
2 min |
Installation and Maintenance Tips
Description |
| Flush the zone after installation and once a year. |
| Install Drip Emitters in XBD-80 with self-piercing barb end up. |
| Run 1/4" tubing through the drain hole in the bottom of the pot for invisible installation prior to planting. |
| Leave 6" slack in 1/4" tubing next to mainfold in case of unexpected maintenance. |
Click-n-Buy - Click on Parts in Picture Below to Add Items to Your Cart

|
|
|
|
Copyright © 2010 IrrigationRepair.com - All Rights Reserved |
|