|
|
|
 |
Landscape Drip Irrigations
Drip Irrigation Parts and Instructions for all of Your Needs |
|
|
|
SOLUTION |
|
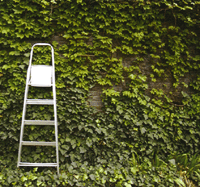
Landscape Dripline
Advantage:
- Up to 60% water savings
- Targeted watering helps reduce erosion of wall
- No run off = reduced liability in high traffic areas
|
|
|
INSTALLATION & MATERIALS LIST |
Click-n-Buy - Click on Part Number to Add Items to Your Cart |
Part Number |
Description |
LD 09 12 |
Landscape Dripline 0.9 gph @ 12" spacing |
XCZ-LF-100 |
1" Xeri Control Zone Kit |
MDCF Series |
Easy Fit Compression Fittings / Adapters |
TDS-050 |
Tie Down Stake |

To-Do List
Description |
Time (Approx.) |
| Assemble Control Zone Kit and connect to water source. |
1 hr |
| Cut lengths of Landscape Dripline to lay lateral below retaining wall. |
10 min / 50' |
| Connect lengths of Landscape Dripline to Easy Fit Fittings and add Flush Cap to end. Connect to Control Zone Kit. |
15 min / 50' |
| Staple Landscape Dripline grid in place and flush for 2 minutes. |
2 min |
| Install Planting material. |
|
Installation and Maintenance Tips
Description |
| Flush the zone after installation and once a year. |
| Install AR Valve Kit at high point in the system. |
| Leave Landscape Dripline coil in the sun while preparing for installation. |
Click-n-Buy - Click on Parts in Picture Below to Add Items to Your Cart

|
|
|
|
Copyright © 2010 IrrigationRepair.com - All Rights Reserved |
|