How To Use Insert Fittings With Poly Tubing
One of the great things about a poly tubing system is what’s not there: glue.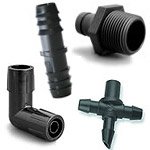 That’s right, you use very little primer and glue in a poly tubing system, if any. The fittings are all simple pressure and/or clamp, making it very easy to install. And a good deal cleaner.
Since poly tubing is mostly used in drip systems, we’ll take a look at the fittings used in a drip system. However, regardless of the application, the basic techniques are the same.
Drip systems depend on flexible tubing, in sizes from ¼” to 1”, to deliver the water. A common setup would have a 1/2” main line with numerous ¼” lines branching off to the plants. We’ll discuss the main line connections first.
The main line starts at your valve. Since valves are made of PVC you will need something to adapt the poly to fit the valve. To do this, most people use an adapter composed of a pressure regulator, a y-strainer, and a swivel adapter. These are available as pre-assembled kits, or as individual pieces which you can assemble yourself. This takes the system from a ¾” PVC to a ½” tubing. The tubing will slip over the end of the connector with a ridged or “barbed” connection. You may put a crimp clamp on the tube to ensure a tight fit but it is probably not needed.
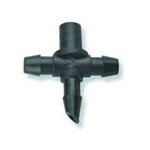
Now the ½” tubing is running down the garden. As we go down the line we want to run a drip line from the tube to each plant. One way is to use barbed fittings. You punch a hole in the main line using a simple tubing punch and install your fitting. The fittings have one pointed end that you push into the main line; it then self-seals, giving you an instant ¼” feed connection. The one in the picture on the right has the punch end and two barbed connections. The ¼” tubing will simply press onto the barbed connectors. 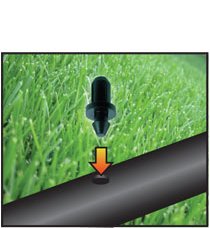 Some fittings are self-piercing, meaning you won’t need the tubing punch. The punch does make things easier.
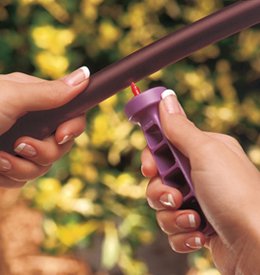
What if you make a mistake? What if you changed your mind? Now you have a hole you don’t need. Well, enough mistakes have been made during installation that they developed a great solution. It’s called a goof plug. Push it in the hole and it is sealed. Again, no glue needed.
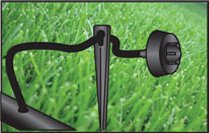
Now you have your ¼” drip line attached to the barbed fitting on the main line. All you have left is to cut to length and attach your emitter. Emitters come in all kinds of shapes and patterns but they are also press-fit. Choose the one you want, push it on, and put it in place. You will want to use something to hold it in place so there are stakes available. A simplified example is shown here. You have the main line, a ¼” drip line, an emitter and a stake to hold it in place.
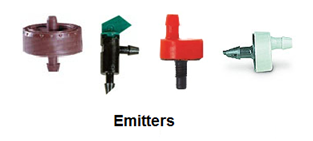 This is a picture of 4 common emitters. Notice some have threaded connectors (the red one), some have square barbed connectors (the brown one) and the others have pointed barbs. The red one screws into a connector, the others just push into the tube. They are each designed for slightly different applications but they can all work on the same system. There is no one “best.” Each manufacturer has its own style. You can mix and match as you wish.
Things went well and you have all your emitters in place and need to extend the main line. There are three basic types of connectors: barbed, barbed with lock nuts, and compression. In each of them you simply push the tube onto the connector. With one you tighten the lock nuts down for grip, the others depend on pressure to stay in place.
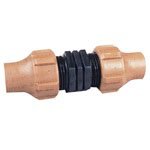
The lock nut connector is designed to work with the slight variations in tubing that comes from different manufacturers. With poly tubing ½” does not always equal ½”. There are variances brand to brand. If you are tying into an existing system and don’t know the exact tubing size/brand you have you can use the lock nut connector.
As you’ve noticed by now, almost all the connectors in drip irrigation depend on some form or pressure or compression to stay in place. It is a very simple system, doesn’t need glue, and easily installed by just about anyone.
One final note: while you can easily mix and match manufacturers' products, be very careful about buying your main line tubing and connectors. As mentioned before, they do vary in size by brand. The following dimensions are all considered standard ½” tubing:
1/2" Poly Tubing ID and OD chart
Nominal Pipe Size: |
Inner Diameter (ID): |
Outer Diameter (OD): |
½" |
0.520" |
0.620" |
½" |
0.600" |
0.700" |
½" |
0.615" |
0.710" |
They are all correct, all work. However, you don’t want to try and put the smaller size on the same connector as the larger. With tubing and connectors, if you start with DIG, stay with DIG, or if you start with Rain Bird, stay with Rain Bird. The connections will be better and life will be easier.


